How to Deploy a Self-hosted thirdweb Engine On Railway In Less Than 3 Minutes
Learn how to deploy instantly your self-hosted thirdweb Engine on Railway in less than minutes.

A Filipino self-taught software engineer, open-source maintainer, cybersecurity researcher, tech community builder, Web3 enthusiast, and technopreneur from the Philippines. 💻💖☕
Are you looking for a production-grade HTTP server to interact with any smart contract on any EVM? That's the thirdweb Engine!
Engine is a backend HTTP server that reads, writes, and deploys contracts on a large scale. It allows you to create and interact with backend developer wallets, supporting high throughput with automatic nonce and gas management. Think of this as your rail transport vehicle or train Engine for your Railway. 🚂
Railway is a deployment platform created to simplify the software development lifecycle. It starts with instant deployments and easy scaling and includes CI/CD integrations and built-in observability. Let's say this is the Railway track for your train Engine. 🛤️
In this tutorial blog, you'll learn how to deploy your self-hosted thirdweb Engine on the Railway platform in less than 3 minutes using our community-contributed Railway template. This is the official community Railway template maintained by the thirdweb community team.
Without further ado, let's deploy your Engine to its Railway. 🚂🛤️ (you get it?)
Requirements
Wallet address. (any EVM-compatible wallet address)
Steps
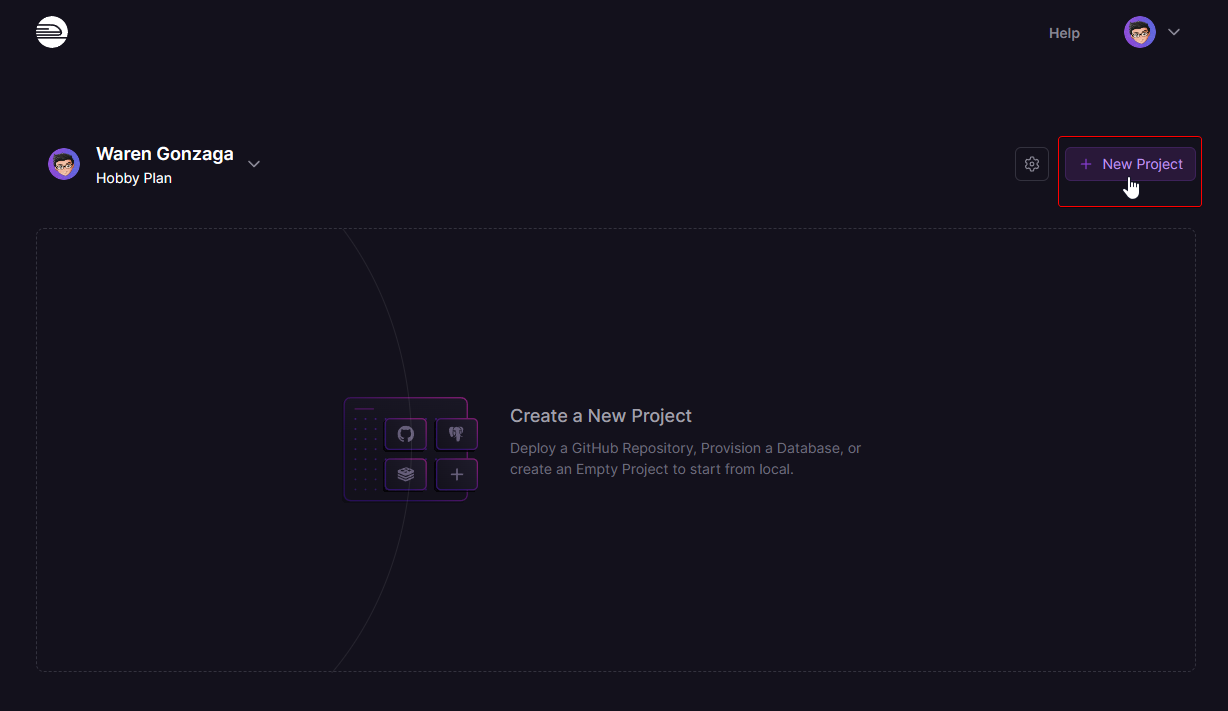
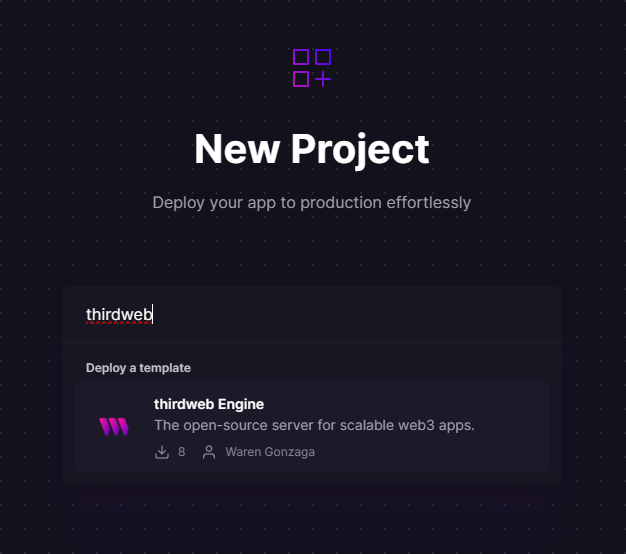
Go to your Railway dashboard and create a "New Project."
On the new project page, search for "thirdweb" or "thirdweb Engine," and you will find the template we created.
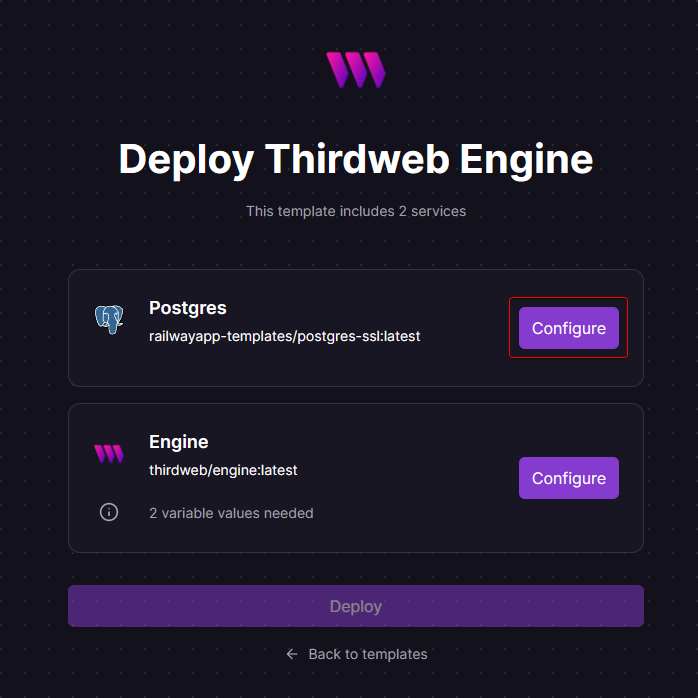
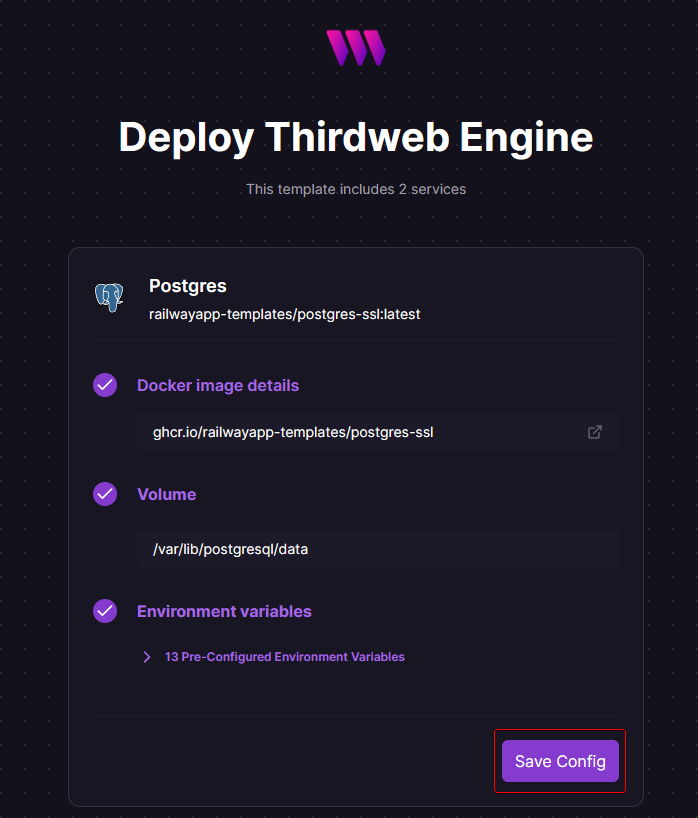
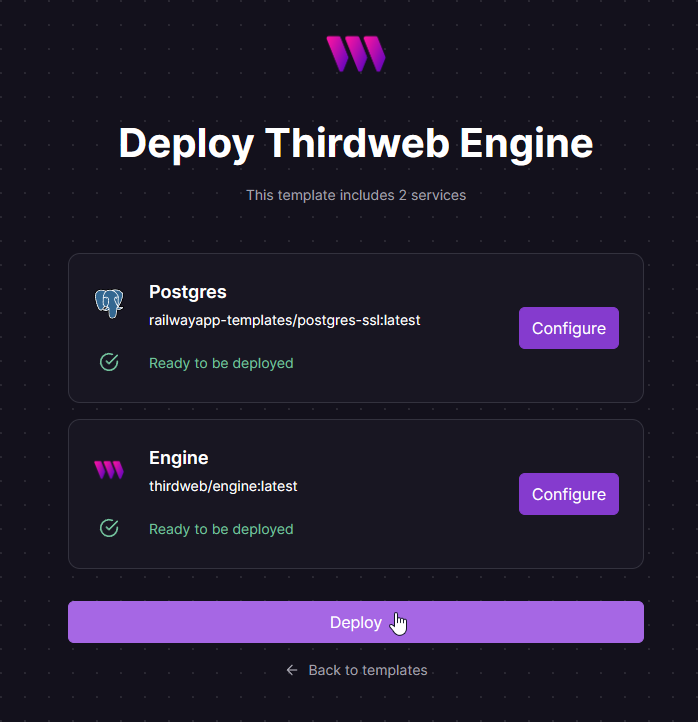
You will be redirected to the deploy page. First, click the "Configure" button for the Postgres service. Lastly, save the configuration and return to this page.
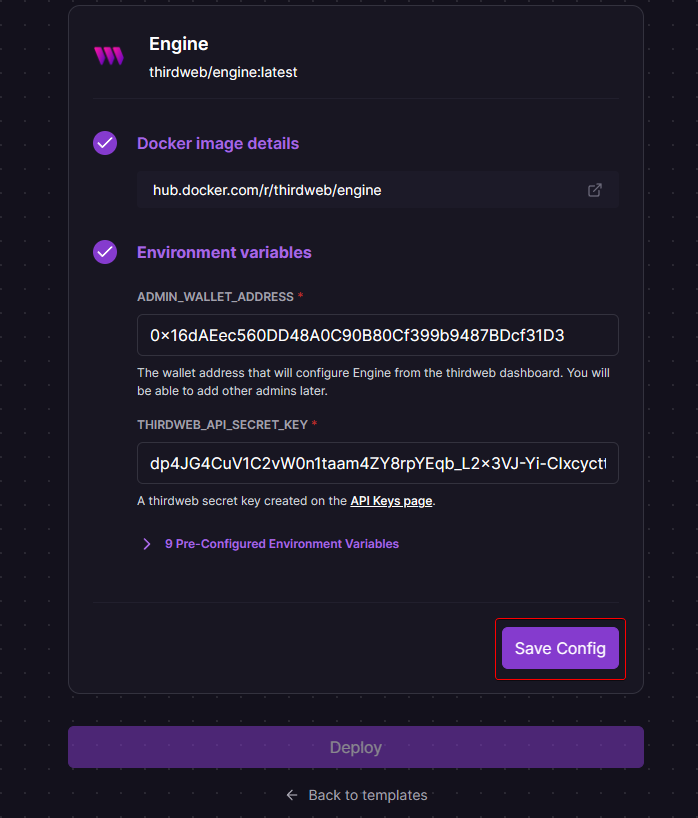
Let's set up the thirdweb Engine service. Enter your wallet address into the
ADMIN_WALLET_ADDRESSfield, and then enter your "thirdweb API secret key" into theTHIRDWEB_API_SECRET_KEYkey input field. After that, save the configuration and return to the template deployment page.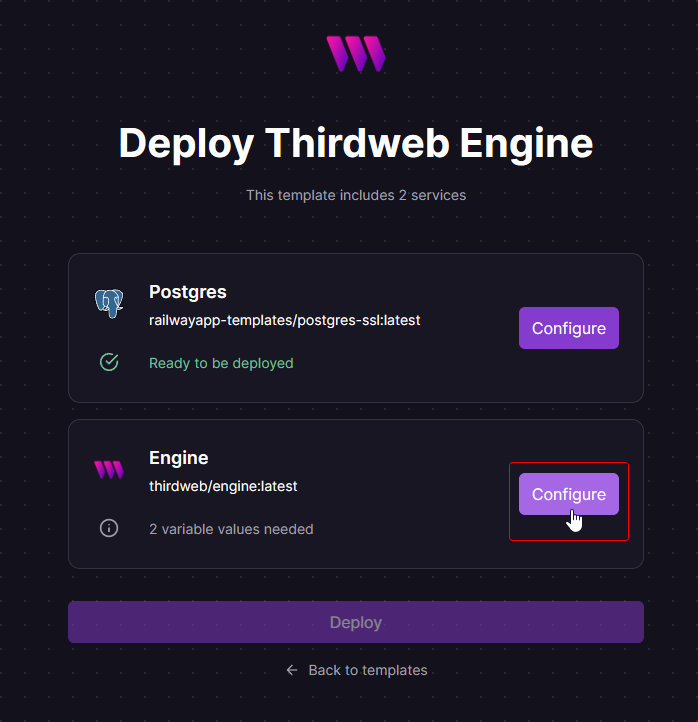
All you have to do is click the "Deploy" button and wait.
In less than 3 minutes, your thirdweb Engine will be ready for use. Go to your Engine service > Settings > Networking > Public Networking to find your endpoint URL.
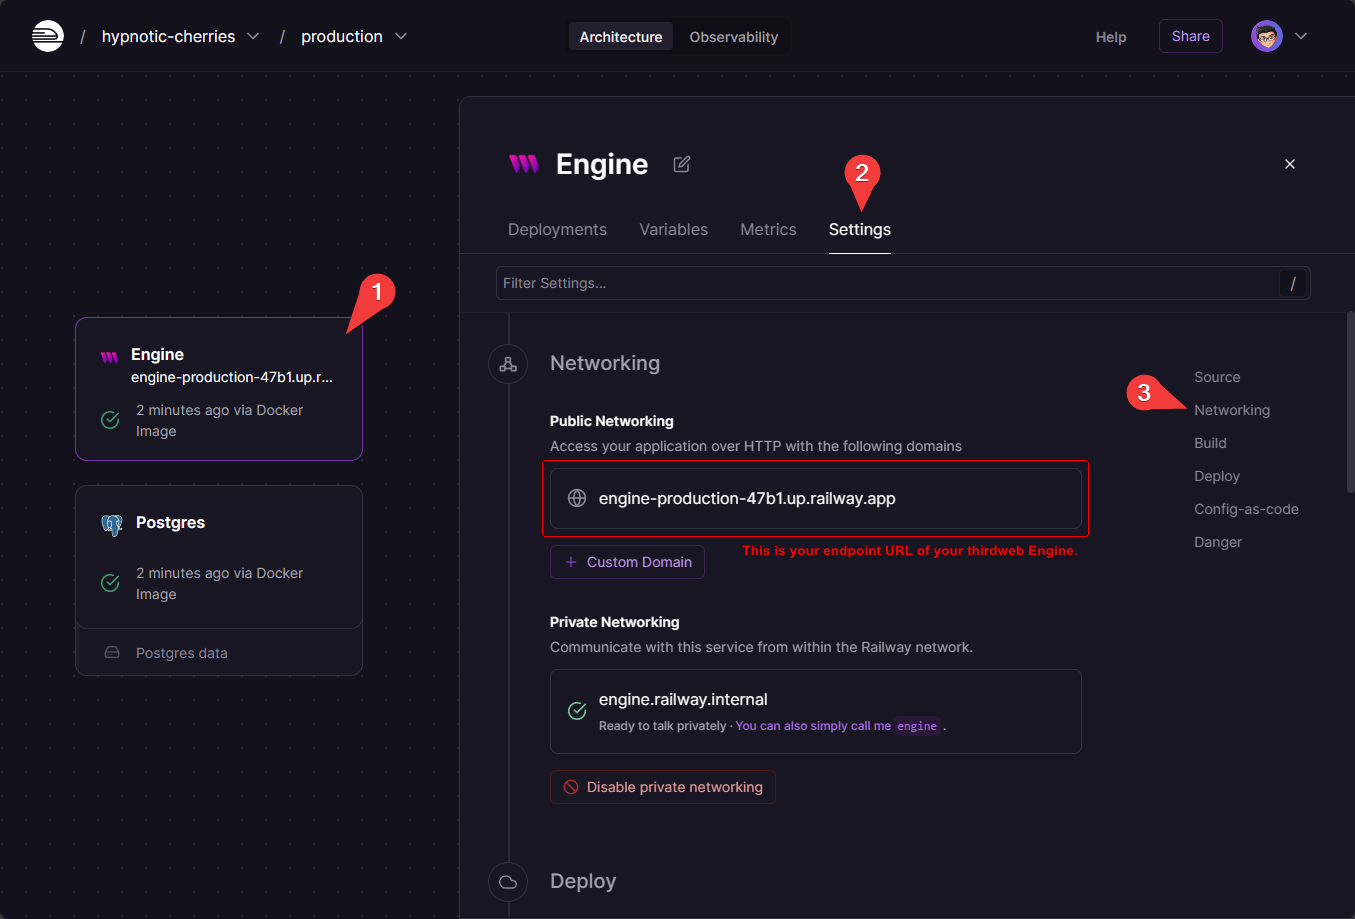
Open this endpoint URL in your browser, and you'll receive an API message response. This indicates a successful Engine installation. Be sure to save this; you will need it to import into your thirdweb Engine dashboard.

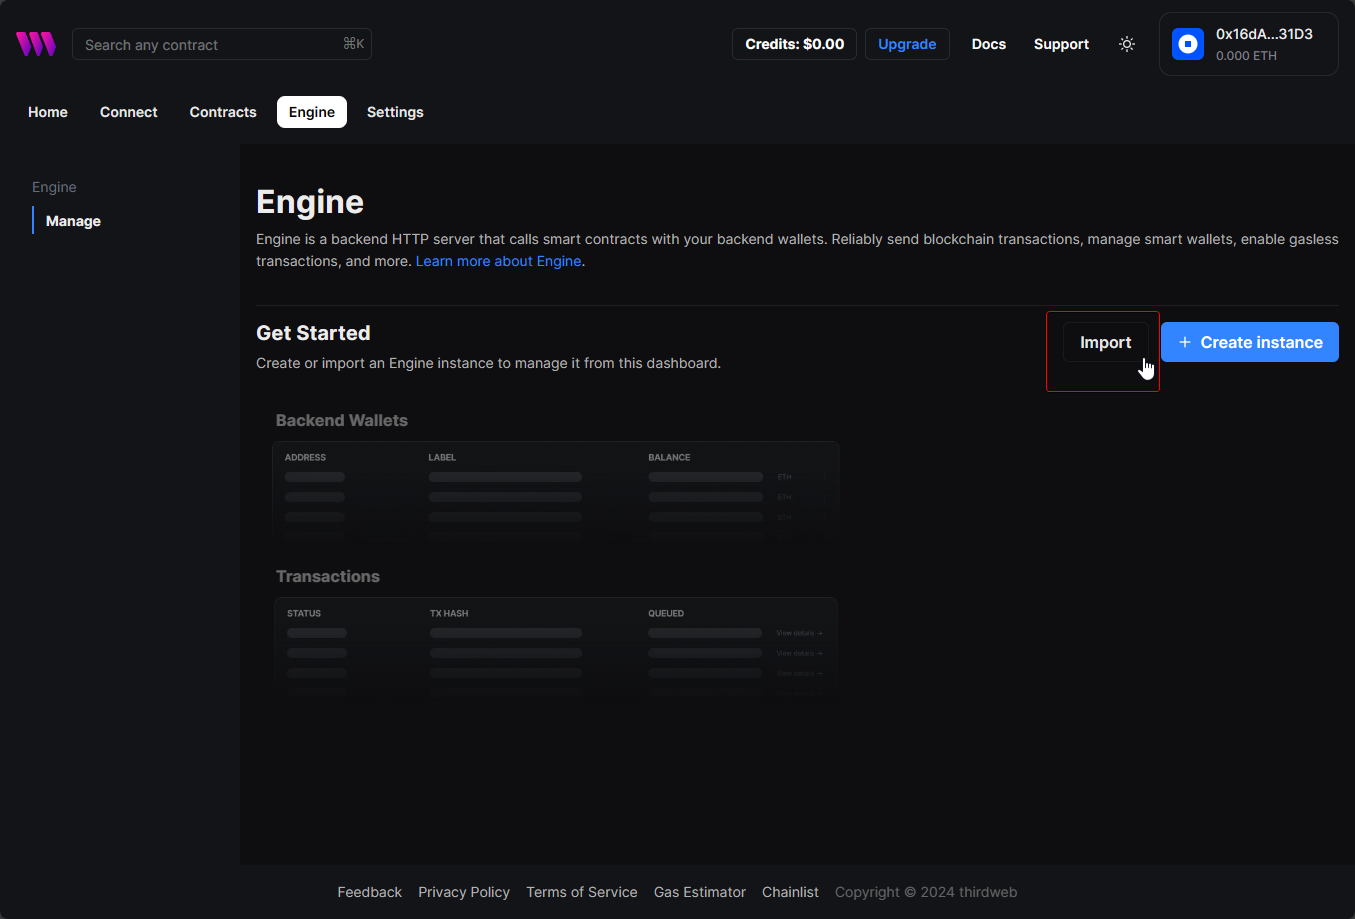
Manage Ending from the Dashboard
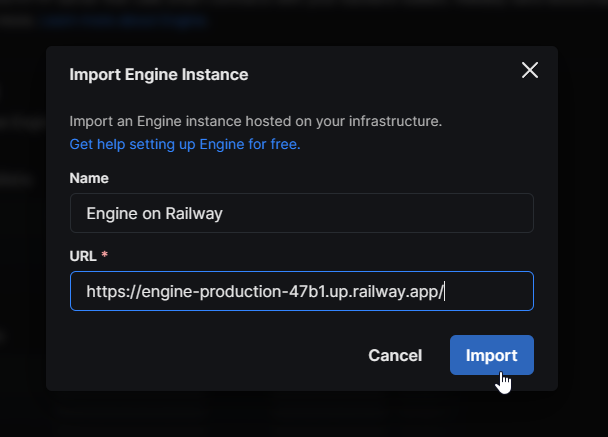
Now, let's import your endpoint URL to your thirdweb dashboard. Navigate to your Engine dashboard and select the "Import" button.
Name your self-hosted thirdweb Engine, enter the endpoint URL from your Railway project, and click the import button. Follow the example provided below.
After you import it, it should look like this. Go ahead and view and manage your self-hosted thirdweb Engine from your account dashboard.
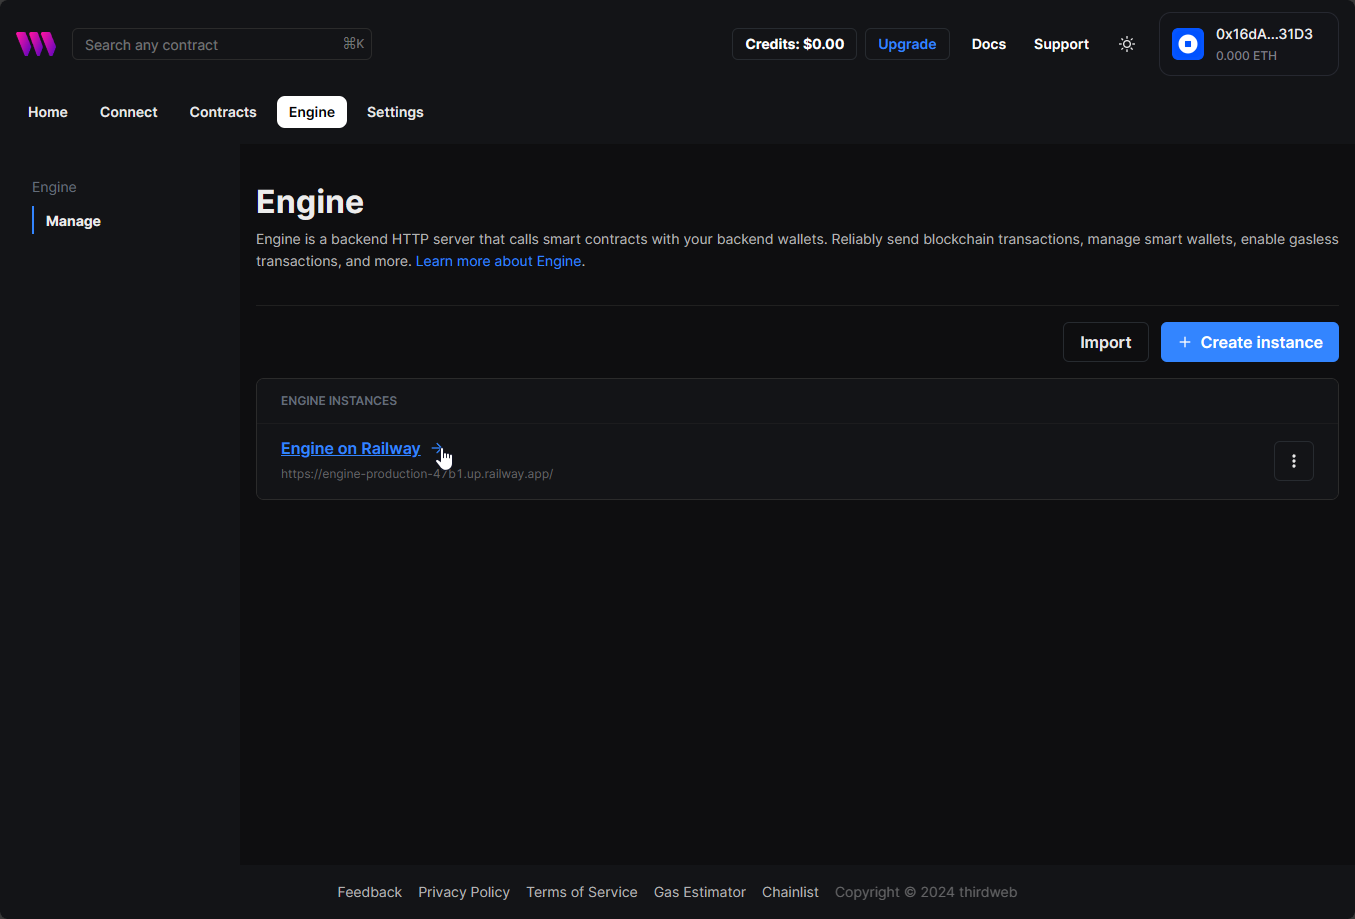
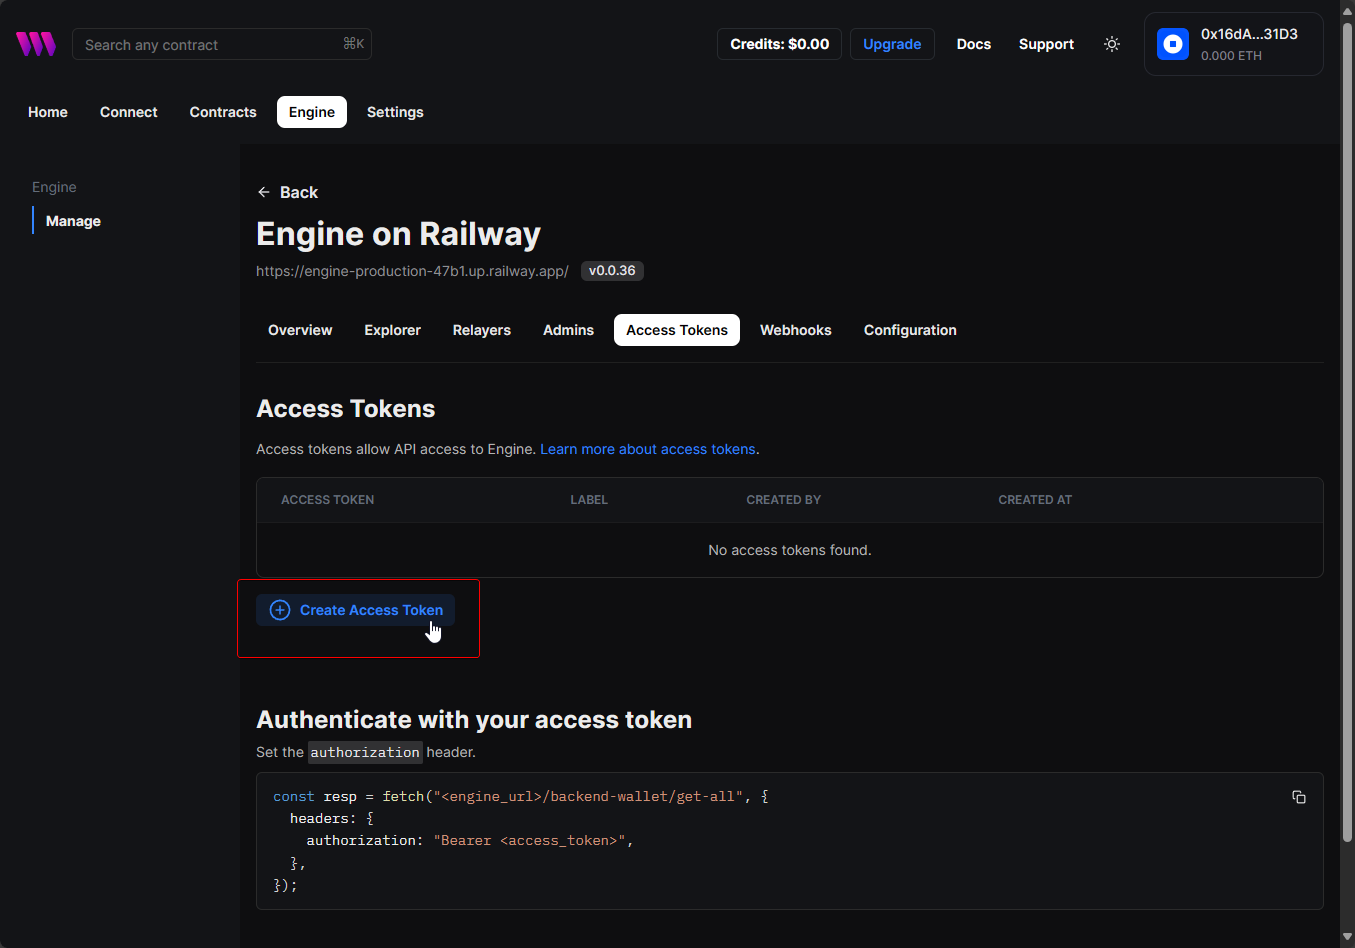
Don't forget to create your backend wallet to execute write transactions and generate your access token. This will allow you to interact with your Engine API.

Testing
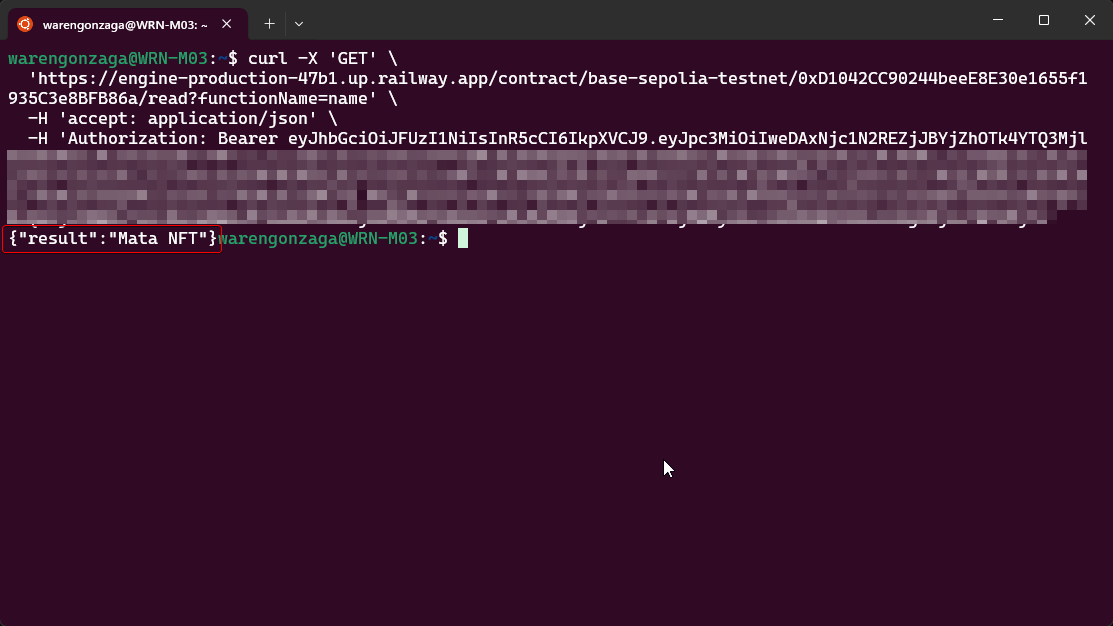
In this section, let's test your engine to see if it works. The simplest method is to make a direct request using curl in your terminal. Just replace the <xxxx> with your Railway endpoint URL and provide your access token from your thirdweb Engine dashboard.
We will send a GET request to read the contract information for name on the base-sepolia-testnet chain. Let's use 0xD1042CC90244beeE8E30e1655f1935C3e8BFB86a as our test contract address.
curl -X 'GET' \
  'https://engine-production-<xxxx>.up.railway.app/contract/base-sepolia-testnet/0xD1042CC90244beeE8E30e1655f1935C3e8BFB86a/read?functionName=name' \
  -H 'accept: application/json' \
  -H 'Authorization: Bearer <your access token here>'
Copy and paste this command into your terminal and press enter. It should return a response with the name of our test contract. The name should be Mata NFT.
You can also use the Insomnia software to test your Engine. We performed a similar request using its graphical user interface (GUI). Enter your access token in the Bearer field as your authentication method, and then input your GET request URL. After that, click "Send." You should receive a 200 response code and the test contract's name.
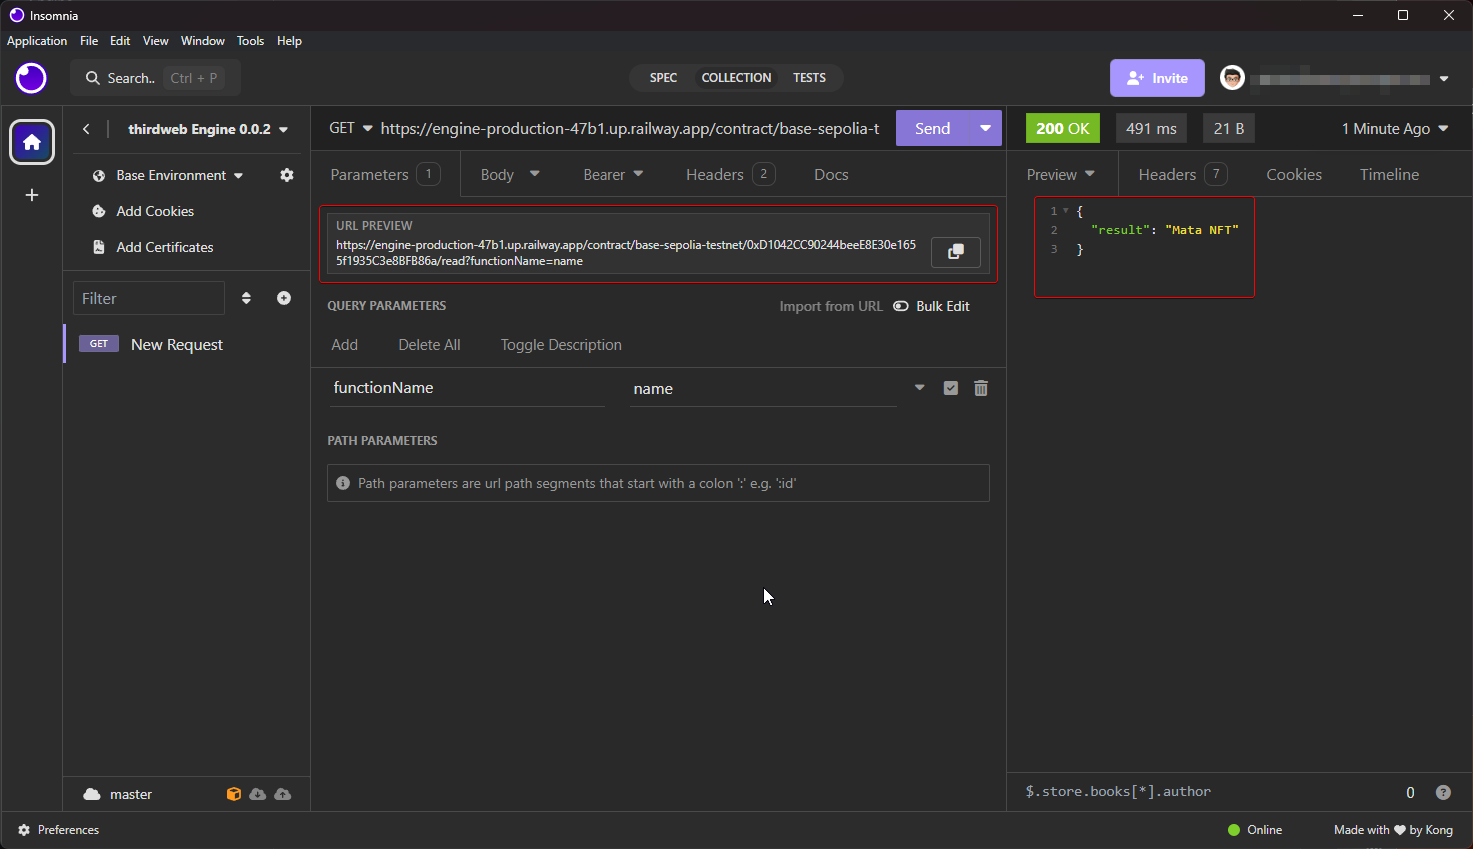
This is it. If you see a similar result, you're good to go! 🚂🛤️
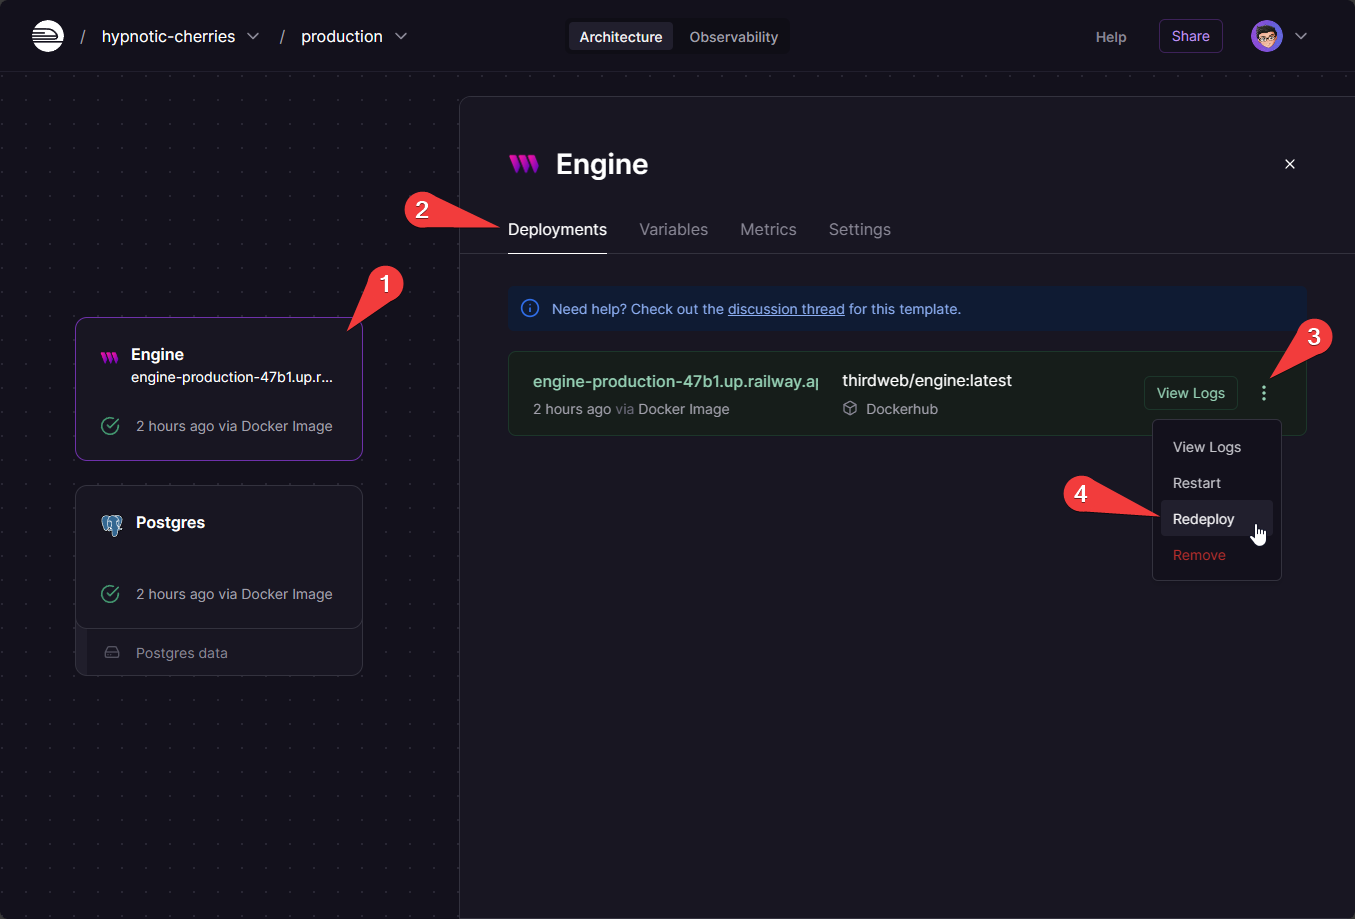
Update
You need to update the version manually from the Railway dashboard. To do this, navigate to your Engine service and redeploy the source.
Enjoy, and keep building! 🫶